• Skip to primary navigation
  • Skip to main content

Osher Lifelong Learning Institute

  • Member Resources
  • Teach at OLLI
  • Sign In
  • Join OLLI
  • Home
  • About Us
  • Videos
  • Request a Catalog
  • Explore Courses
  • Clubs & Activities
  • FAQ
  • Search
  • Donate

OLLI Clubs

AV / Technology Support Committee - aka - "The Tom Swift Squad"

July 4, 2019 by Paul

swift-0001


The AV / Technology Support Committee serves as an adjunct to OLLI's staff, in assisting instructors with classroom audiovisual and computer equipment. Membership is open to any OLLI member, at all our locations, who has an interest in helping our teachers and staff with classroom technology. You don't need to be a tech guru to be a member of the committee. Like everything at OLLI, your commitment to lifelong learning is paramount - we'll teach you what you need to know! The committee's goal is “A Swiftie in every classroom, supporting OLLI staff in providing AV excellence for all our members.”

100409_equip_setup

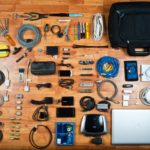
April 9, 2010 - Equipment setup for OLLI Recorder Consort. Photo by Dan Feighery


The committee chair is appointed by OLLI's President, and reports to the Executive Director. Reports of committee activities are provided to the OLLI Board on a regular basis, and are published in the document section of the OLLI Member Portal.

Committee chair: Paul Howard
Vice chair: Bill Walsh
Contact: [email protected]

Link to: Equipment Reference Web Page


Committee Members (as of July, 2019): John Acton, Tom Appich, Kathy Barnard, George Bradshaw,  Larry Cereghino, Garrett Cochran, Debbie Engleson, Terri Feldmayer,  Mel Goldfarb, Bob Heyer, Paul Howard,  Dave Lynch, Pat McGinty, Ernestine Meyer, Mel Mikosinski, Michael Nephew, Dave Osterman, Dave Selove, Brenda Soares, Russell Stone, Dave Talaber, Bill Walsh, Nick Wenri


Accomplishments of the Committee: Since its conception in the summer of 2007, OLLI's AV / Technology Support Committee, also known as "The Tom Swift Squad," has assumed a primary mission of having comparable AV and computer resources available in every OLLI classroom. Our efforts have resulted in the following major improvements to OLLI's instructional resources:

  • Hitachi / Maxell WU5603 Laser Video Projectors installed in TA1, TA3- full HD, 20K hour light source life (Fall, 2019)
  • Hitachi CP-WU8461 Projector moved to TA2, 16X9 aspect ratio and full HD resolution (Fall, 2019)
  • New screens with 16 X 9 aspect ratio and 123" diagonal image size placed in TA1, TA2, TA3 (Fall, 2019)
  • Lenovo All-in-One computer placed in TA2' providing 24" confidence screen for instructors (July, 2019)
  • Yamaha RX-V485 Multimedia Amplifiers (2) Installed in UCP Reston AV Cabinets to allow HDMI video and sound connections (Spring 2019)
  • Audio Technica Gen3 Series3000 C Band wireless mic systems installed in Loudoun (2) and Reston (3), replacing D band units (Spring, 2019)
  • Lumens PS752 Document Cameras, replacing older models in TA1, TA2, TA3 (Spring 2019)
  • Lumens PS751 Document Camera moved from TA1 to Tallwood Annex (Spring 2019)
  • Audio Technica 14 Gen4 Series 3000 replacement wireless mic systems for Tallwood classrooms, 'Road Show' cases - Caused by FCC UHF channel repack (Winter 2019)
  • Lenovo All in One computer for TA3 trial of touch screen computer for classroom use in TA3 (Fall 2018)
  • Hitachi CP-WU8461 Projector installed in TA1 with 16X9 aspect ratio and full HD resolution (Feb, 2018)
  • Hitachi CP-SX8350 Projector moved from TA1 to TA2 (Feb 2018)
  •  Six Dell  Laptops - classroom replacements in Tallwood, Reston, COGS, LofL Fairfax (Winter 2018)
  • Two Asus  Laptops for backup service in classroom and offsite locations (Winter 2018)
  • Two Asus  Laptops for backup service in classroom and offsite locations (Winter 2018)
  • Asus Laptop replacement for TA2 classroom (Fall 2017)
  • Onkyo TX-NR676 Multimedia Receiver installed in TA3, replacing Sony with overheat issues (August, 2017)
  • Audio Technica wireless mic system added to TA3 (Relocated from Cottage classroom, March 2017)
  • Samsung BD-6500 BluRay Player installed in TA3 (Zumbro Donation) (Winter 2017)
  • Yamaha and Sony (Persell Donation) Multi-media amplifiers installed in TA2 and TA3 to allow HDMI Video / Audio connections.
  • Samsung BluRay player acquired for use in TA2(Fall 2016)
  • Toshiba DVR620 DVD / VHS Combo Players (2) acquired for use in TA2 / TA3 (Fall 2016)
  • Samsung BluRay players acquired for use at Lord of Life Locations (2) and (1) for Reston (August 2015)
  • Toshiba DVR620 DVD / VHS Combo Players (2) acquired for use in Reston Classrooms (May / July 2015)
  • Audio Technica wireless microphone systems (2) acquired for use in TA1 (May 2015)
  • Hitachi video projector upgraded in Lord Of Life-Fairfax for greater brightness (May 2015)
  • Rolls RM219 mixers swapped into Road Show Kits I & II; Phonic RM801 mixers moved to RS kits III & IV (April 2015)
  • Road Show IV Kit for Lord of Life - Fairfax: Two AT C Band wireless mic systems (April 2015)
  • Road Show III Kit for Lord of Life-Clifton: Two AT C Band wireless mic systems; Anchor Audio Powered & Passive Speakers, Phonic mixer (March 2015)
  • Toshiba Laptops (two) for 2nd classrooms at LofL locations (March 2015)
  • Audio Technica portable wireless microphone system acquired for use as needed at Tallwood or remote locations (November 2014)
  • Toshiba Laptops with BluRay optical drives for TA2, TA3, and 'Road Show' kit. (June 2014)
  • Lumens PS 751 document camera for Reston (June 2014)
  • Lumens PS 751 document camera with HDMI switching and 1080P resolution added to TA1. Replaced docucam moved to Cottage. (February 2014)
  • LifeSize 10X Camera added to TA1 as 'audience cam' acquired from generosity of anonymous donor (January 2014)
  • Audio Technica portable wireless microphone system acquired for use in Reston locations (December 2013)
  • LG Flat panel display, permanent camera mountings added to TA1 for videoconferencing (December 2013)
  • Allen&Heath MixWizard4 audio mixer added to TA1 for videoconferencing & advanced audio capability (October 2013)
  • LAN and Telephone connections added to Tallwood Social Rm Annex for origination of audio & videoconferences (August 2013)
  • LifeSize Express 220 videoconferencing system acquired for eventual deployment in Reston. (August 2013)
  • Hitachi video projectors upgraded in Tallwood classrooms for better resolution and/or HDMI input capability (June 2013)
  • Sound Advance stereo speakers and Sony amplifier installed at UCP Reston, Rms 113/114. (April 2013)
  • Toshiba Laptops (3) for Reston and TA1, with upspec'd processors, BluRay optical drive, HDMI. (March 2013)
  • Zyzel Router and LAN wiring upgrades for video teleconferencing infrastructure and security improvements. (Feb. & March 2013)
  • Rolls Audio Mixers and Key Digital Video Processors added to UCP Reston equipment suites. (Dec. 2012)
  • Audio Technica wireless microphone systems added to largest classroom at each campus. (Dec. 2012)
  • Sound Advance loudspeakers relocated from WPBC, Reston to TA1 for 7.1 channel surround sound operation. (Nov. 2012)
  • LifeSize Room 220 Video Conferencing System aquired for sharing classes and meeting between locations. (Nov. 2012)
  • Two Toshiba Laptop computers - upspec'd w/ I5 processors, 8 Gig RAM, HDMI output, for Video Teleconferencing. (Oct. 2012)
  • Anchor Audio Powered / Remote (unpowered) speakers for Road Show II - used at churches, Woodlands, etc. (Oct. 2012)
  • Onkyo surround-sound receiver / multimedia amplifier, resulting in 5.1 channel sound in TA1 (July, 2012)
  • Polycomm Soundstation VTX1000 speakerphone for remote attendees to board meetings, classes (March 2012)
  • Infinity Interlude speakers and subwoofer in TA1, acquired with directed donation to Friends of OLLI (February 2012)
  • Docucam added to TA2 equipment suite. (January 2012)
  • Four Toshiba Laptop computers acquired for instructional use in Tallwood Cottage. (2011)
  • Three speakers added to Instructor Speech / PA system in TA1. (October, 2011)
  • Seven Toshiba Laptop computers acquired for instructional / classroom use in Tallwood Cottage. (2011
  • "Bus Tour" portable pa system (Spring 2011)
  • New Instructor Speech / PA Bogen system for Loudoun Rm 232 (Spring, 2011).
  • Upgraded LAN at Tallwood from 10BaseT to Gigabit ethernet electronics. (Spring 2011)
  • Upgraded Hitachi Video Projector, TA1; Move of Projectors for TA2 and Tallwood Cottage (Winter 2011)
  • AV equipment suite in Tallwood Cottage room 101 classroom (Winter 2011)
  • Lumens Docucams added to Tallwood and Reston classrooms. (2010, 2011
  • Updated laptop computers in all Reston and Tallwood classrooms, with Office 2007 available on each.
  • Two "Road Show" portable equipment packages of wireless microphone systems and audio mixers, for use when classes are held in remote locations, panel discusions, or performance opportunities for OLLI groups, such as the Recorder Consort, and drama activities. (Spring, 2010)
  • Upgraded wireless microphone systems in TA2, TA3. (Fall, 2009)
  • Wired Internet service in all classrooms in Tallwood and Reston, and in the sanctuary of Washington Plaza Baptist Church.
  • Permanently mounted music quality and PA speakers in Reston and Tallwood.
  • Two complete equipment suites in Reston, functionally equivalent to Tallwood classrooms. (Sep 2009)
  • Hitachi Video projectors of enhanced resolution and high brightness in all Tallwood and Reston classrooms.
  • Quality Audio Technica wireless microphone systems in each classroom (Loudoun, Reston, Tallwood) for instructor use.

The support of OLLI's Board of Directors, Finance Committee, generous member financial contributions to the "Friends of OLLI", and the foresight of Executive Directors, Dick Chobot and Thom Clement, have been vital to these efforts.


History of "The Tom Swift Squad" During the summer of 2007, Paul Howard proposed that a group of volunteers be assembled to assist the OLLI staff with AV problems the staff was wrestling with during classes. At that time, these primarily centered around audio quality for enhancing the instructor's voice. Paul declared, "There are two kinds of sound at OLLI - 'feedback' and 'none' !" Dick Chobot, OLLI's Executive Director, was finding some of the member grousing about AV issues a tad frustrating. A military history buff, Dick suggested that the new group should perhaps be called "The Forlorn Hope" - after the cannon-fodder assemblage of misfits and criminals, thrown at seemingly-impregnable strongpoints, and led by a junior officer without money or influence to gain a higher rank, since success yielded promotion. Paul thought that perhaps the sound issues weren't quite as bleak as that, and suggested "Tom Swift Squad" as an appropriate name for the group, after the series of boy's fiction books highlighting technology and invention, dating to 1910. OLLI's Tallwood Administrator and Registrar, Ann Hartmann, took to calling the volunteers "the Swifties" and so the name continues.


Link to the OLLI Board Handbook: Audiovisual Support Committee


.

Link to: OLLI Home Page

Filed Under: AV Support Committee

OLLI Photo Club – GRC Photography, 201906

May 19, 2019 by George Bradshaw

Welcome to Get It Right in the Camera (GRC) Photography

Welcome to our GRC Photography course (F101). We’ll be meeting in the Tallwood Annex on Tuesdays from 9:40 to 11:05.

This course builds on the concepts taught in the Winter 2019 “GRC Photography” course. (GRC stands for Geting it Right in the Camera.) There will be different challenging shooting assignments given for each week. Before each session, attendees will upload four unaltered jpg images to a designated internet location. Each week there will be an instructor‐led, peer‐to‐peer discussion of that week’s work. The assignment for discussion during the first class will be sent to students when the enrollee list is finalized.

Dan Feighery holds a BS in physics from Saint Joseph’s University in Philadelphia and a master’s in public administration from Golden Gate University in San Francisco.  He has attended photography courses at Northern Virginia Community College and George Mason University.  He founded the OLLI Photography Club and has taught OLLI photography classes.


File Naming Convention for OPC Courses

The file naming convention for OLLI Photo Club (OPC) courses is similar to that used for the OPC’s routine galleries:

  • The filename contains two fields: the photographer’s name and the image’s title,
  • The title field of a filename will include up to two elements: the image’s descriptive title, and in some cases, a Photo ID to ensure filename uniqueness,
  • “hyphens”, preceded and followed by a “space” character, will separate the two fields, and
  • The title field may contain “spaces.”


The filename format "for this course only" is

LastnameFirstinitial - Title [ PhotoID ]

The brackets ( “[“ and “]” ) indicate an optional element in the filename.  This optional element is used only to ensure filename uniqueness.  The course’s instructor may require use of a particular form of the PhotoID.

Examples:

          When the title is unique

          SmithJ - Beautiful Trees.jpg


          When duplicate titles must be made unique

          SmithJ - Beautiful Trees 1.jpg

          SmithJ - Beautiful Trees 2.jpg


          When the camera’s filename is used to ensure uniqueness

          SmithJ - Beautiful Trees IMG_1234.jpg

          SmithJ - Beautiful Trees IMG_5678.jpg


          Other filename formats that will not be used in this course

          IMG_1234.jpg
          IMG_1234-Edit-1.jpg
          yyyymmdd-hhmmss.jpg


Notes:

The only characters allowed in a filename for this course are alphanumerics, “spaces,” “hyphens,” and, for camera filename elements only, “underbar.”

The “.jpg” suffix is normally appended by your PC’s software.

“PhotoID” is only required when needing to distinguish among multiple photos.

The last three examples are just for information purposes.  They are other typical file naming formats designed to ensure uniqueness of file names, the first being a camera-generated filename, the second indicating the existence of an external photo “editor” such as PhotoShop, and the third a date and time stamp.

- - - - - - - - - - - - - - -

Uploading Instructions for OPC Courses

  1. Create a JPEG (.jpg or .jpeg) photo named according to the "File Naming Convention" specified for the gallery. Note: Depending upon your workflow, you may not want to change the name of an original JPEG file; in this case, change the name of a copy of the original file.
  2. Enter the "upload link" into your browser to show the OPC’s "Upload to ‘Gallery’ ” window.  Note: some courses have a "Sandbox" gallery to practice the upload process. You will receive an email from the instructor with an upload link for a Sandbox gallery (if used in the course) and for a gallery specific to each session of the course.
  3. Drag and drop your photo file(s) into the window (or "Browse Computer") using the file manager of your PC:
    1. in Microsoft Windows, the file manager is File Explorer;
    2. in Apple macOS, the file manager is Finder.
  4. Wait until the upload completes and click the "Done" button.
  5. View your images at the appropriate OPC gallery. For example, this course's galleries are maintained at the OPC photo repository (https://olliphotoclubgmu.smugmug.com), and the galleries can be found via the following menu sequence:

          > Galleries
          > Special
          > OLLI Courses
          > "Name of Course"


          For example, access to the "Name of Course" could be

          > Intermediate DSL Photography, 201809


          Access to the practice gallery (Sandbox) would then be:

          > "Course name abbreviation" Sandbox

          (e.g., "> IDP 201809 Sandbox")


          And access to the "Name of Course" for an assignment gallery would then be:

          > "Course name abbreviation" YYYYMMDD

          (e.g., "> IDP 20180918")


- - - - - - - - - - - - -

Filed Under: OPC Courses, Photography Club

OLLI Photo Club - Intermediate DSLR Photography, 201903

March 4, 2019 by George Bradshaw

Welcome to Intermediate DSLR Photography

Welcome to our Spring 2019 Intermediate DSLR Photography course (F104). We’ll be meeting in the Tallwood Annex on Tuesdays from 9:40 to 11:05. This course will have a photo assignment announced each week.

This course assumes attendees can find the basic camera controls including focusing the lens, adjusting white balance, and selecting the shutter speed and aperture settings. We’ll start discussing how those elements work together in making a photograph.  Each week we’ll discuss and practice shooting topical pictures including table-top/macro, landscape, nature, sports and others.  Prior to the first class each attendee is asked to upload a recent favorite photo to the class's gallery.

- - - - - - - - - - -

Dan Feighery earned a BS in physics from St. Joseph’s University in Philadelphia and a master’s in public administration from Golden Gate University in San Francisco. He was the founder of the OLLI Photography Club and has taught various photography courses over the past several years. Photography has been one of his hobbies for the past seven decades.

File Naming Convention for OPC Courses

The file naming convention for OLLI Photo Club (OPC) courses is similar to that used for the OPC’s routine galleries:

  • The filename contains two fields: the photographer’s name and the image’s title,
  • The title field of a filename will include up to two elements: the image’s descriptive title, and in some cases, a Photo ID to ensure filename uniqueness,
  • “hyphens”, preceded and followed by a “space” character, will separate the two fields, and
  • The title field may contain “spaces.”


The filename format for this course only is

LastnameFirstinitial - Title [ PhotoID ]

The brackets ( “[“ and “]” ) indicate an optional element in the filename. This optional element is used only to ensure filename uniqueness. The course’s instructor may require use of a particular form of the PhotoID.

Examples:

When the title is unique

SmithJ - Beautiful Trees.jpg


When duplicate titles must be made unique

SmithJ - Beautiful Trees 1.jpg

SmithJ - Beautiful Trees 2.jpg


When the camera’s filename is used to ensure uniqueness

SmithJ - Beautiful Trees IMG_1234.jpg

SmithJ - Beautiful Trees IMG_5678.jpg


Other filename formats that will not be used in this course

IMG_1234.jpg
IMG_1234-Edit-1.jpg
yyyymmdd-hhmmss.jpg


Notes:

The only characters allowed in a filename for this course are alphanumerics, “spaces,” “hyphens,” and, for camera filename elements only, “underbar.”

The “.jpg” suffix is normally appended by your PC’s software.

“PhotoID” is only required when needing to distinguish among multiple photos.

The last three examples are just for information purposes. They are other typical file naming formats designed to ensure uniqueness of file names, the first being a camera-generated filename, the second indicating the existence of an external photo “editor” such as PhotoShop, and the third a date and time stamp.

- - - - - - - - - - - - - - -

Uploading Instructions for OPC Courses

  1. Create a JPEG (.jpg or .jpeg) photo named according to the "File Naming Convention" specified for the gallery. Note: Depending upon your workflow, you may not want to change the name of an original JPEG file; in this case, change the name of a copy of the original file.
  2. Enter the "upload link" into your browser to show the OPC’s "Upload to ‘Gallery’ ” window. Note: some courses have a "Sandbox" gallery to practice the upload process. You will receive an email from the instructor with an upload link for a Sandbox gallery (if used in the course) and for a gallery specific to each session of the course.
  3. Drag and drop your photo file(s) into the window using the file manager of your PC:
    1. in Microsoft Windows, the file manager is File Explorer;
    2. in Apple macOS, the file manager is Finder.
  4. Wait until the upload completes and click the "Done" button.
  5. View your images at the appropriate OPC gallery. For example, this course's galleries are maintained at the OPC photo repository (https://olliphotoclubgmu.smugmug.com), and the galleries can be found via the following menu sequence:

> Galleries
> Special
> OLLI Courses
> "Name of Course"

For example, the "Name of Course" for the practice gallery (Sandbox) is:

> "Course name abbreviation" Sandbox

(e.g., "GRC Sandbox" or "DCF Sandbox")

And the "Name of Course" for an assignment gallery is:

> "Course name abbreviation" YYYYMMDD

(e.g., "GRC 20190122," "DCF 20180918," etc.)


- - - - - - - - - - - - -


Filed Under: OPC Courses, Photography Club

OLLI Photo Club – GRC Photography

December 21, 2018 by George Bradshaw

Welcome to Get It Right in the Camera (GRC) Photography

Welcome to our Intermediate DSLR Photography course (F102). We’ll be meeting in the Tallwood Annex on Tuesdays from 9:40 to 11:05.

This course is designed for those who attended the 2018 summer “GRC Photography” course. Through weekly assignments we will strive to capture the best possible photo while concentrating on content, arrangement, and exposure of whatever is in the picture space, before the application of any post‐processing. Instruction will focus primarily on use of digital single‐lens reflex (DSLR) cameras. Attendees will be encouraged to use the manual rather than an automatic camera mode. Both technical and artistic intermediate level instruction will be adjusted to the needs of attendees. Class participants will capture at least 20 images each week, selecting their best four photos each week for individualized instructor comment followed by interactive classroom review. The assignment for discussion during the first class will be sent in advance to attendees.

Dan Feighery holds a BS in physics from Saint Joseph’s University in Philadelphia and a master’s in public administration from Golden Gate University in San Francisco.  He has attended photography courses at Northern Virginia Community College and George Mason University.  He founded the OLLI Photography Club and has taught OLLI photography classes.


File Naming Convention for OPC Courses

The file naming convention for OLLI Photo Club (OPC) courses is similar to that used for the OPC’s routine galleries:

  • The filename contains two fields: the photographer’s name and the image’s title,
  • The title field of a filename will include up to two elements: the image’s descriptive title, and in some cases, a Photo ID to ensure filename uniqueness,
  • “hyphens”, preceded and followed by a “space” character, will separate the two fields, and
  • The title field may contain “spaces.”


The filename format for this course only is

LastnameFirstinitial - Title [ PhotoID ]

The brackets ( “[“ and “]” ) indicate an optional element in the filename.  This optional element is used only to ensure filename uniqueness.  The course’s instructor may require use of a particular form of the PhotoID.

Examples:

          When the title is unique

          SmithJ - Beautiful Trees.jpg


          When duplicate titles must be made unique

          SmithJ - Beautiful Trees 1.jpg

          SmithJ - Beautiful Trees 2.jpg


          When the camera’s filename is used to ensure uniqueness

          SmithJ - Beautiful Trees IMG_1234.jpg

          SmithJ - Beautiful Trees IMG_5678.jpg


          Other filename formats that will not be used in this course

          IMG_1234.jpg
          IMG_1234-Edit-1.jpg
          yyyymmdd-hhmmss.jpg


Notes:

The only characters allowed in a filename for this course are alphanumerics, “spaces,” “hyphens,” and, for camera filename elements only, “underbar.”

The “.jpg” suffix is normally appended by your PC’s software.

“PhotoID” is only required when needing to distinguish among multiple photos.

The last three examples are just for information purposes.  They are other typical file naming formats designed to ensure uniqueness of file names, the first being a camera-generated filename, the second indicating the existence of an external photo “editor” such as PhotoShop, and the third a date and time stamp.

- - - - - - - - - - - - - - -

Uploading Instructions for OPC Courses

  1. Create a JPEG (.jpg or .jpeg) photo named according to the "File Naming Convention" specified for the gallery. Note: Depending upon your workflow, you may not want to change the name of an original JPEG file; in this case, change the name of a copy of the original file.
  2. Enter the "upload link" into your browser to show the OPC’s "Upload to ‘Gallery’ ” window.  Note: some courses have a "Sandbox" gallery to practice the upload process. You will receive an email from the instructor with an upload link for a Sandbox gallery (if used in the course) and for a gallery specific to each session of the course.
  3. Drag and drop your photo file(s) into the window using the file manager of your PC:
    1. in Microsoft Windows, the file manager is File Explorer;
    2. in Apple macOS, the file manager is Finder.
  4. Wait until the upload completes and click the "Done" button.
  5. View your images at the appropriate OPC gallery. For example, this course's galleries are maintained at the OPC photo repository (https://olliphotoclubgmu.smugmug.com), and the galleries can be found via the following menu sequence:

          > Galleries
          > Special
          > OLLI Courses
          > "Name of Course"

          For example, the "Name of Course" for the practice gallery (Sandbox) is:

          > "Course name abbreviation" Sandbox

              (e.g., "GRC Sandbox" or "DCF Sandbox")

          And the "Name of Course" for an assignment gallery is:

          > "Course name abbreviation" YYYYMMDD

              (e.g., "GRC 20190122," "DCF 20180918," etc.)


- - - - - - - - - - - - -


Filed Under: OPC Courses, Photography Club

OLLI Photo Club – HTML Test Page – Themes of the Year

October 29, 2018 by George Bradshaw

Overview • Galleries (See Galleries) • Monthly Themes • Field Trips • Speakers • Projects


OPC Themes for 2019

Thematic collections of photographs can help keep conversations about the artwork “on topic.” The collection may then elicit different impressions, identifications of technique, and artistic assessments from each viewer of each photograph. Sharing those impressions, techniques and assessments can be a first step toward improving our technical and artistic skills, as well as helping develop the “art of seeing,” as Freeman Patterson would say.


January            Hands. The fun of photography is the ability to tell a story through pictures. The ability to freeze time and capture moments, memories, and images that express emotion and feeling. Though we are often drawn to the eyes of the subject, there is nothing more powerful than the stories that can be told by a person’s hands.

                         As humans we use our hands to talk, weave stories with our hands through pencil and paper, we cry into our hands, use them to show love, and affection, to climb mountains, and to stifle laughter. What more could you ask for when capturing a subject for a photo then one full of chapters ready to share?

February          See Red. We don’t know if Cupid really loves red, but since we’re ambushed with the color in February in celebration of Valentine’s Day, we ought to photograph it. Red is famously one of the most difficult colors to capture authentically on film, especially in natural lighting.

                         Red symbolizes passion, fire, love and anger. In Eastern cultures, it connotes luck and prosperity. Red occurs throughout nature, from dying stars to dying leaves, and humans have evoked its powers for everything from politics to sports.

March               Disappearing Technologies. An increasing number of millennials have never used a landline, worn an analog wristwatch, or mailed a handwritten letter. They do not learn art and design technologies that previous generations took for granted. The scope of digital technology has made many things obsolete, from traditional black-and-white film to the tape cassette, but they have not disappeared completely. In the hands of artists and designers, a bygone technology can take on a new significance. What’s your disappearing technology?

April                 Self-Portrait. It is surprising how many photographers are reluctant to turn the cameras on themselves, but some of the world's most famous photographers have done just that. Using yourself as your model doesn't necessarily mean a seated portrait, but is more an excuse to experiment with poses, costumes, and artistry with the only model you'll ever have who won't complain. It helps to use a tripod and shutter release, rather than limiting yourself by trying to photograph with the camera at arm’s length. You decide how you want to show yourself to the world!

May                   Emotion. One thing that makes a great photo is its ability to convey emotion and thus connect with the viewer. Happiness and joy, sorrow and despair, these are some of the easier emotions as they are universally felt, at one time or another, by everyone.

                         Emotion, or a feeling, is what can bring a snapshot out of obscurity and make it shine. Think of a normal sunset picture from the shores of Hawaii with just the horizon and a bright orange sun dipping low. It’s beautiful for sure and even better when viewed in person. Now pull the zoom back to a wider angle and show a couple in silhouette, sitting on lounge chairs facing the waves and reaching to each other to hold hands. Different people will connect with each photo in different ways, or maybe not at all. Those in a romantic mood will enjoy the photo of the couple and those looking for calm without distraction may enjoy the singular sunset.

June                  Black and White. One of the most common reasons people want to make black and white photos today is because it lends a certain timeless quality to the images. While the “when” and “why” are related, photographing in color and then wondering whether to convert the image employs a very different mindset from setting out and seeing the world in black and white, and then working within those confines. Parameters of a world without color forces you to see things differently, to stretch and work out your photographic eye muscles, and that in turn pushes you creatively.

                         Focus on composition and lighting, the two strongest elements of a black and white photograph. These are important because black and white composition does away with the distraction of color. Suddenly elements within the frame can relate in a way that might otherwise have been throw off because of jarring color.

July                   Abstracts. Abstraction, in general, is a process by which some information is carefully eliminated leaving the parts that deemphasize the object-photograph relationship. For instance, get a sheet of paper and a pen, put your hand with fingers slightly separated, and draw an outline of your hand.

                         You now have just the outline information, the shape of your hand, by eliminating the skin texture, color, depth, form, etc. It has no fingerprints! This is how abstraction in general works, we leave some information behind and keep the parts we want to include in the photograph. The outline you have just drawn is “just a hand” not necessarily your hand, breaking the linkage between the subject and the image drawn.

August             No Meeting Scheduled.

September       Photograph a Stranger. It doesn’t matter what you say to people, the most important aspect of approaching people to photograph tem is being genuine, warm, friendly and calm. People will read your body language before you open your mouth, so if you come off as tense they will probably think you are shifty. If you are not smiling, people are going to think you’re unfriendly. Of course being a bit nervous is natural. It’s totally normal. But the more you practice, the calmer you’ll become. Then you’ll settle into yourself more, get a little pattern going and it’ll be much easier. It doesn’t matter much what you say, how you say it, or what you are working on, how people react to you is almost 100% because of your body language and the feelings you have when you approach them.

                         You must be quick and be prepared. Don’t fumble with removing a lens cap, changing settings on the camera or putting down a camera bag. Remember, the best street photographers spend the majority of time immersed in society, seeking out their subject, and so should you.

October            Still Life. When most of us think of a still life photo, we generally think of a created still life where we build the entire composition–from choosing the most photogenic bowl, to what fruit to use, to how to position and light all the other elements.

                         When you walk your favorite trail and run across a fallen leaf sitting on a particularly attractive rock, that’s a still life, too. If you photograph it as is, without making any adjustments, it’s a found still life.

                         When photographing a still life subject, you are creating an image rather than capturing a moment. You are constructing your photograph; from background, to subject, to lighting. With the subject matter being inanimate objects, their tendency to stay very still allows you to take time to refine your lighting, and experiment with your composition. It’s a very pleasant way to photograph, and you don’t need any fancy gear. It’s also a great way to learn about lighting and composition, the key elements to any photographic style.

November        Play with Liquids.  [Inserted 20191106] Play with liquid and the possibilities are endless. Different colored water, paints, and oils all create interesting patterns and shapes that can easily be captured, even in small spaces. Or, get up close and macro with a single water drop. When you stop to think about how liquid reflects light and changes form, you'll see how endless the possibilities really are.

                         (The following text was incorrectly included with the "Play with Liquids" theme.  It appears to be text associated with the theme "Perspective."  When you are photographing a mundane object, you don’t need to worry about it growing tired of posing, so have fun with this project and take as much time as you need. Try different angles, lie on the ground, climb up on something, do whatever it takes to snap pictures that transform ordinary into extraordinary. For more inspiration, pay attention to other photographers when you are out at a popular attraction and observe their positions. Try mimicking their positions to see what they are seeing because even if you look odd, the great photographs you take are worth it.

December        Things Neatly Organized, or “Knolling Photography.”“Knolling photography” (Google it to find out more) involves photographing objects grouped together and arranged neatly, either parallel or at right angles to one another. The look of the resulting image can be quite clean and clinical - as opposed to a jumble of items, everything is neatly laid out.

                         The technique is very useful whenever you want to photograph a group of items, with each item clearly identifiable. Knolling is often used for sharing an image of the contents of a bag. But, of course, it can be used for other things too, such as the ingredients for a meal, clothes that form an outfit, a small book collection, or just a collection of related items you think would work well for a knolling photo.

                         Before you start laying your items out, think about the background you will lay them out on. You want something that is quite plain and does not distract from the items. Importantly, it also needs to be large enough for you to fit all the items on in a neat arrangement. Here is an example.

                         Knolling can be very useful to obtain a pleasing image when photographing a group of items that could otherwise be a bit boring. Why not give it a try, photographing the contents of your handbag, your camera bag, or the ingredients for a home-cooked dinner?


Overview • Galleries (See Galleries) • Monthly Themes • Field Trips • Speakers • Projects


Filed Under: Photography Club

OLLI Photo Club – Intermediate DSLR Photography

August 28, 2018 by George Bradshaw

Welcome to Intermediate DSLR Photography

Welcome to our Intermediate DSLR Photography course (F105). We’ll be meeting in the Tallwood Annex on Tuesdays from 9:40 to 11:05. This course will have a photo assignment announced each week.

In these photography sessions our primary focus will be on getting it right with a camera. The course is designed for individuals who are proficient in using their adjustable digital cameras and might like to work more on visual design. The instructor will concentrate on the elements and principles of art as they apply to photography. Attendees will complete weekly shooting assignments and present their digital (.jpg) images (preferably right out of the camera) for peer review and discussion. A shooting assignment for review during the first class will be sent in advance to all attendees.

Dan Feighery earned a BS in physics from St. Joseph’s University in Philadelphia and a master’s in public administration from Golden Gate University in San Francisco. He was the founder of the OLLI Photography Club and has taught various photography courses over the past several years. Photography has been one of his hobbies for the past seven decades


File Naming Convention for OPC Courses

Photo file names have the following format (note there are no “spaces” in the file name):

.....LastnameFirstinitial-PhotoID  (Format for this Course)

Examples:

.....SmithJ-Unique_Title.jpg

.....SmithJ-Beautiful_Trees.jpg

.....SmithJ-Beautiful_Trees_1.jpg
.....SmithJ-Beautiful_Trees_2.jpg

.....SmithJ-Beautiful_Trees-IMG_1234.jpg
.....SmithJ-Beautiful_Trees-IMG_1235.jpg

Other Formats:

.....IMG_1234.jpg
.....IMG_1234-Edit-1.jpg
.....yyyymmdd-hhmmss.jpg


Notes:

The “.jpg” suffix is normally appended by your PC’s software. “PhotoID” is required to distinguish among multiple photos.

The file name contains no "spaces." "Hyphens" are used to separate fields. Elements within fields may be separated by the underscore character (_), for example, some camera systems use special characters such as the underscore for file names.  All other characters are alpha-numeric.

In the examples above, the file name with the PhotoID of "Unique_Title" could be as simple as

.....SmithJ-Beautiful_Trees.jpg;

however, if there are two photos of trees the PhotoIDs must be unique, such as

.....Beautiful_Trees_1 and Beautiful_Trees_2.

This is the method which may be used in the camera course.

The last three examples, just for information, are other typical file naming formats designed to ensure uniqueness of file names, the first being a camera-generated filename, the second indicating the existence of an external photo “editor” such as PhotoShop, and the third a date and time.

- - - - - - - - - - - - - - -

Uploading Instructions for OPC Courses

  1. Create a JPEG (.jpg or .jpeg) photo named according to the "File Naming Convention"specified for the gallery. Note: Depending upon your workflow, you may not want to change the name of an original JPEG file; in this case, change the name of a copy of the original file.
  2. Enter the "upload link" into your browserto show the OPC’s "Upload to ‘Gallery’ ” window. Note: the upload link to the “Sandbox” gallery used for practicing the upload process is https://olliphotoclubgmu.smugmug.com/upload/ZW2n5D/s0.  You will receive an upload link to the upload gallery for each session of the course in an email.
  3. Drag and drop your photo file(s) into the windowusing the file manager of your PC:
    1. in Microsoft Windows, the file manager is File Explorer;
    2. in Apple macOS, the file manager is Finder.
  4. Wait until the upload completesand click the "Done" button.
  5. View your imagesat the appropriate OPC gallery. For example, this course's galleries are maintained at the OPC photo repository (https://olliphotoclubgmu.smugmug.com); the galleries can be found via the following menu sequence:

..........> Galleries
..........> Special
..........> OLLI Courses
..........> "Name of Course"

..........The practice gallery, for example, is then found at this menu item:

..........> "Course name abbreviation" Sandbox (e.g., "GRC Sandbox" or "DCF Sandbox")


- - - - - - - - - - - - -


Filed Under: OPC Courses, Photography Club

  • « Go to Previous Page
  • Page 1
  • Interim pages omitted …
  • Page 3
  • Page 4
  • Page 5
  • Page 6
  • Page 7
  • Interim pages omitted …
  • Page 11
  • Go to Next Page »

OSHER LIFELONG LEARNING INSTITUTE
AT GEORGE MASON UNIVERSITY

4210 Roberts Rd. Fairfax, VA 22032-1028
Phone: (703) 503-3384
Email: [email protected]

Copyright ©2025 Osher Lifelong Learning Institute. All Rights Reserved.

Website designed and developed by Earthcare Technologies Inc.

OLLI Mason is a nonprofit, equal opportunity 501(c)(3) organization
and does not discriminate on the basis of race, color, or national/ethnic origin.